Timber Framing Initiation
At some point in early 2021, I started seeing this thumbnail on YouTube all the time.

Apparently I wasn’t alone. For reasons known only to The Algorithm, “Timber Frame vs Conventional Stick Frame” blew up (to the point that a follow-up was uploaded in March to assuage the rabble). I had resisted watching it, I think because that ubiquitous thumbnail looked so academic. At the time I was more into watching people actually build homes, most notably Woodness Goodness’s Cabin Build, Crafted Workshop’s (Not So Tiny) Tiny House Build, and Essential Craftsman’s Spec House Series. It wasn’t until November, after I’d finished landscaping the front yard, supporting my Dad on the CDT, and digging another dry well, that I finally took the bait. Certainly my renovation projects over the last 3 years had primed me, but it’s astounding in retrospect that it only took 6 minutes to go from knowing nothing about timber frames, to knowing with absolute clarity that I would—one day—build a timber frame home. And I don’t mean “build” as in “have someone build”, I mean “build with my own two hands”.
“Have you ever built a house with your own hands, out of the materials that Nature left lying around? Everyone should have that experience once. It is the most satisfying experience I know. We have been as fascinated as children who build forts or snowhouses, and it has made us the tightest little society in all the West.” —Susan Burling Ward in Angle of Repose by Wallace Stegner
I shared my quasi-religious awakening with Stephanie, who, to my relief, was fully into the exposed beam, form-follows-function aesthetic (with the caveat that she was in no position to sign on for timber framing’s DIY ethic any time soon, if ever). That same night, I emailed Shelter Institute, the folks behind the video, and asked them to add me to the waitlist for all 3 of their sold-out timber framing classes in the first half of 2022. I was disappointed to discover the next day that there were over 100 people on each waitlist, all vying for the same unlikely spot to open. Since it was hard to plan anything beyond Stephanie’s graduation in May, I had to put my timber frame dreams on hold. Or so I thought.
Two months later, I received an email from Blueberry at Shelter. I opened it immediately (because of course I’d watched “How Did Blueberry & Gaius Get Their Names?”). It took me a moment to fully grasp what she had written:
…we have you on the waiting list…we just had a spot open…if you are still interested…please let me know as soon as possible…it will go to the first person to respond affirmatively…
She’d copied 46 people! I looked at the dates of the class: January 24–28th. What was the date again? Thursday, January 20th. The class started on Monday—in Maine! I hesitated. Stephanie would be returning to school that week, but that wouldn’t impact me. I had nothing on my calendar. My garage renovation project was at a good stopping point. How would I get to Maine? Was there enough time to book a flight? Where would I stay? Were there any hotels nearby? How cold would it be? Of course none of this uncertainty mattered if I didn’t get the spot, so I composed the tersest possible affirmative response, “I am definitely interested!”, and hit send. What hath I wrought? Looking back at her email, I saw that I had received it at 10:01am and replied at 10:03. Still, I cursed my brief indecision—what if someone had responded before me? I was researching flights to Maine (as a distraction from the suspense) when Blueberry called to let me know the spot was mine if I wanted it. It felt like I’d won the lottery.
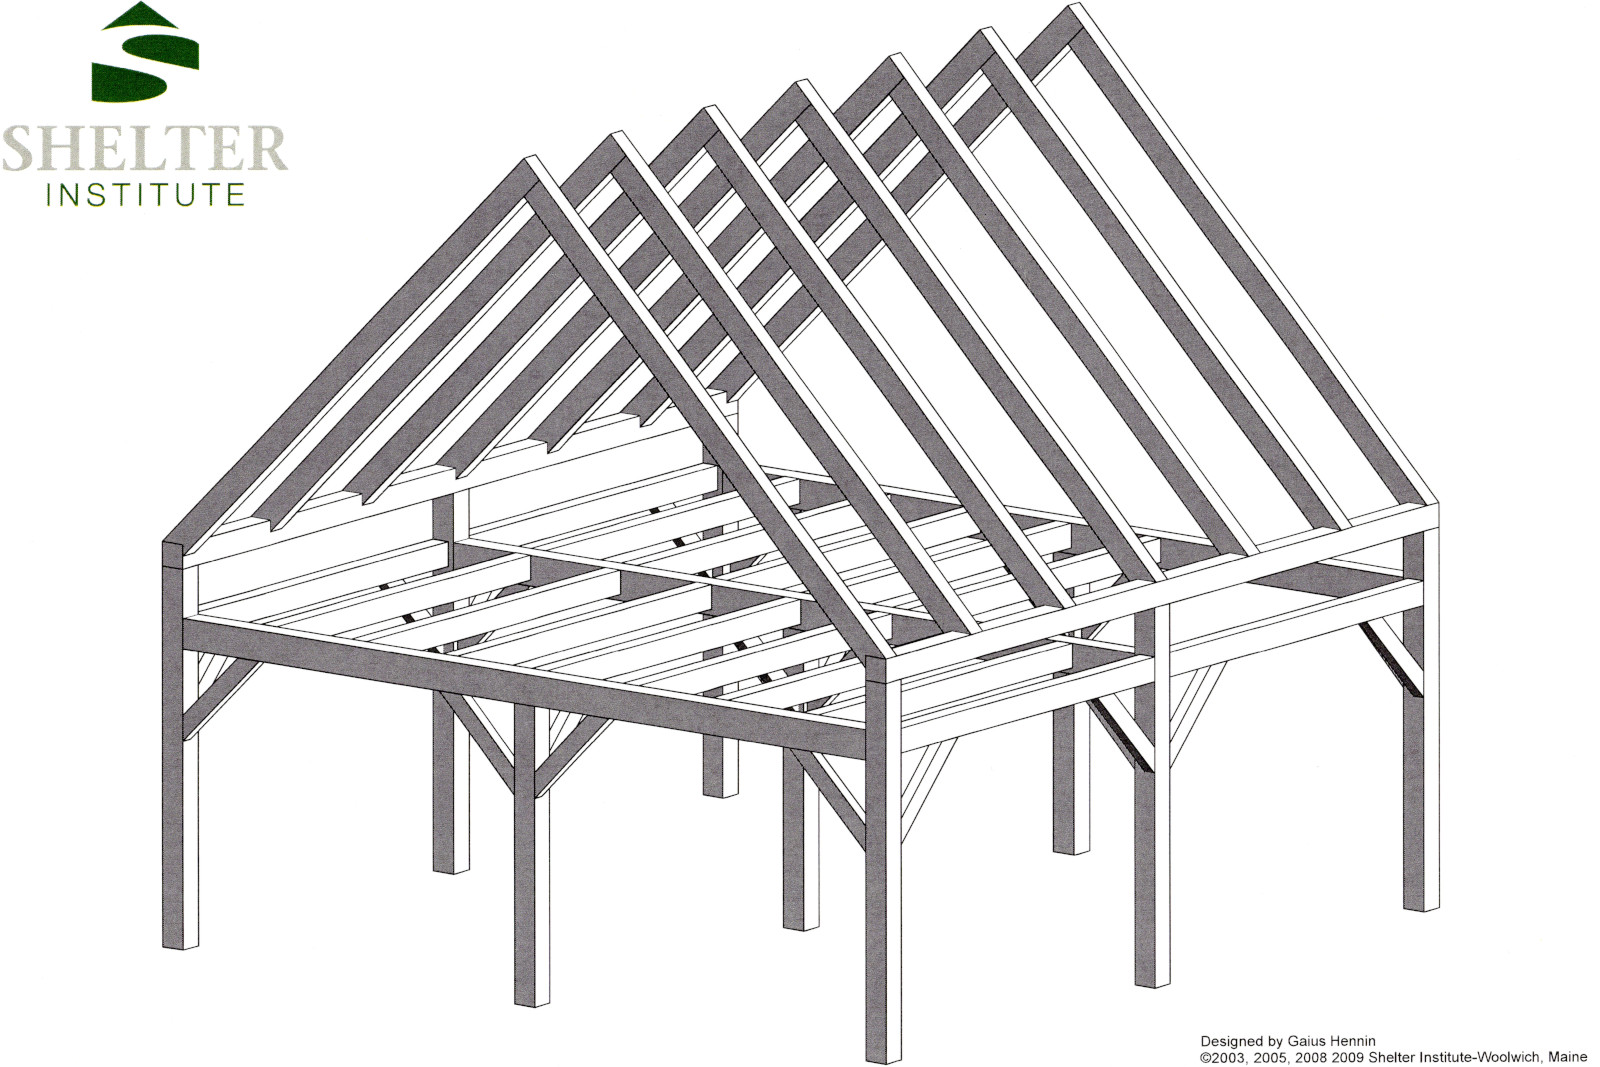
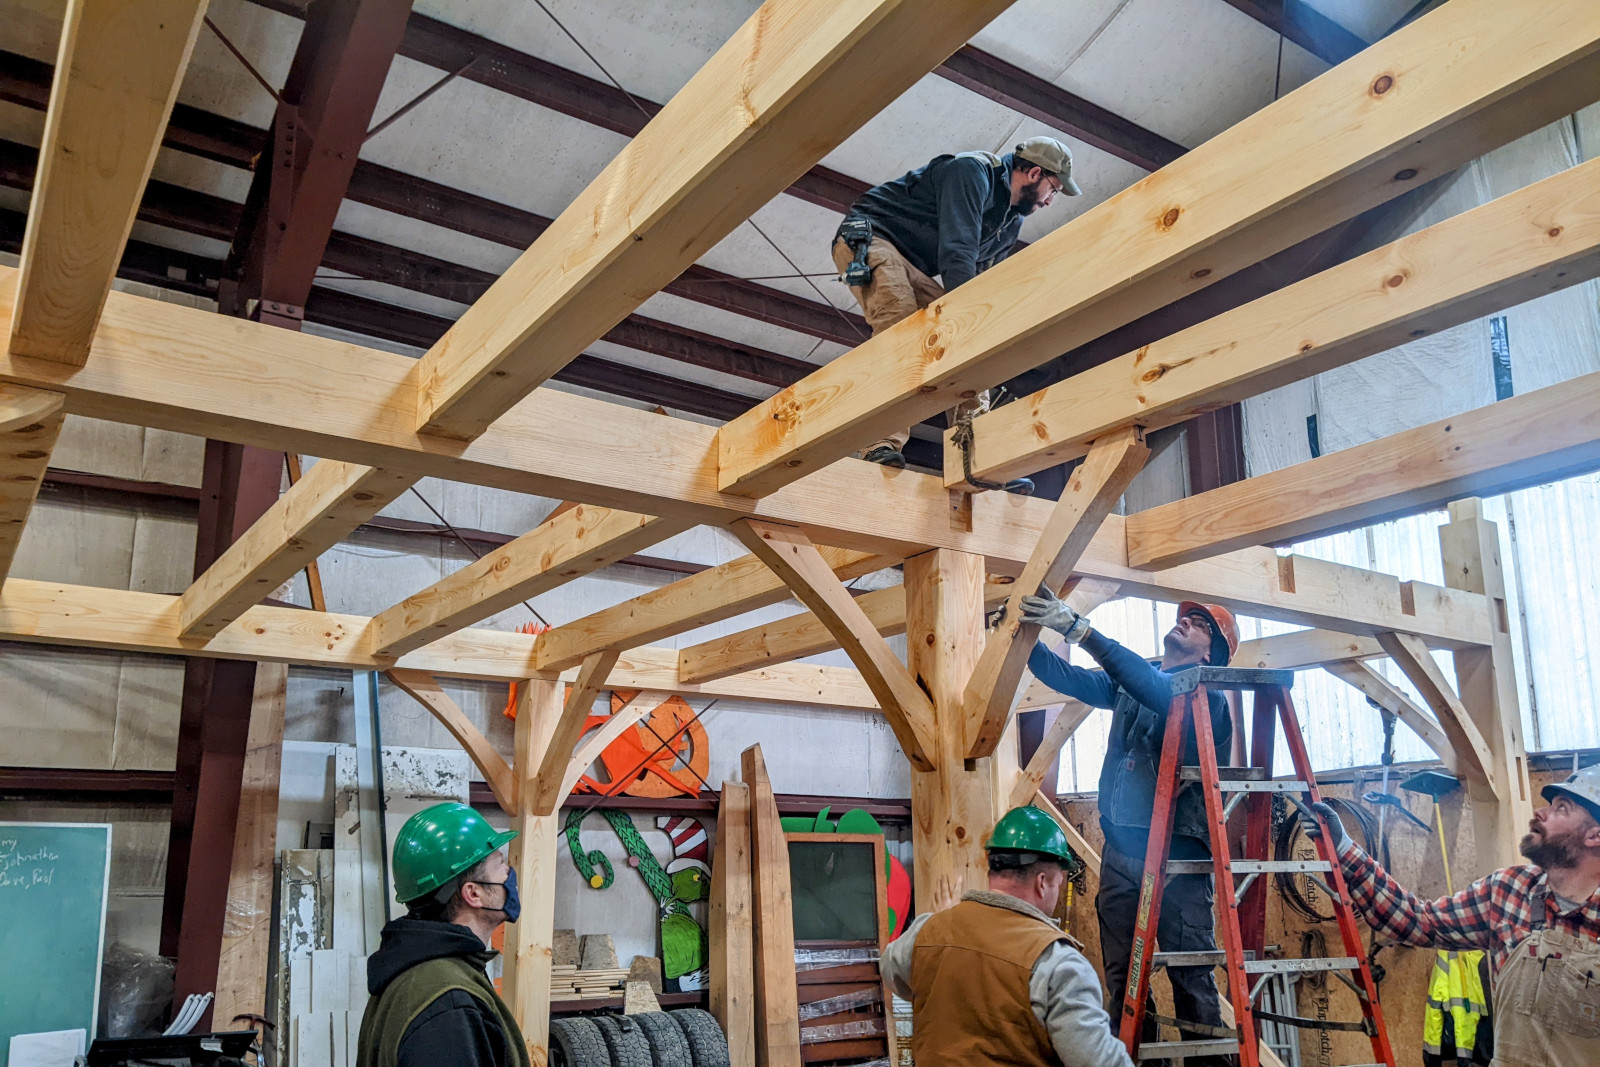
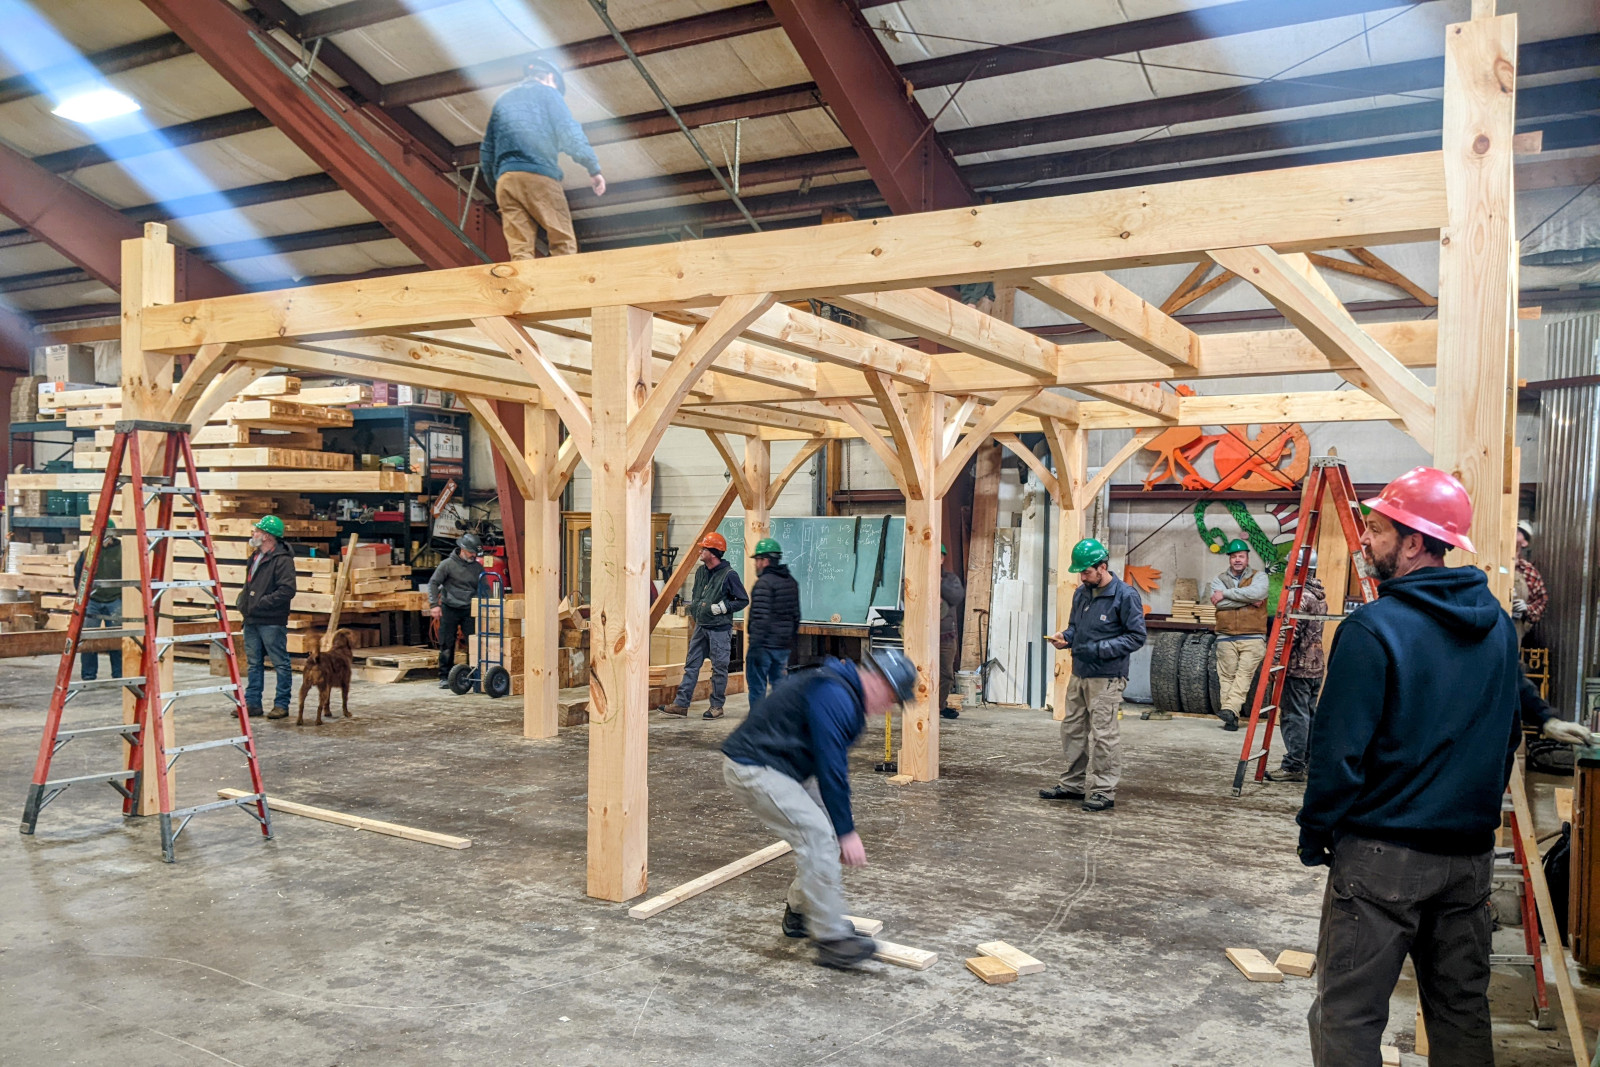
And that’s how I found myself in Woolwich, Maine last week, attending Shelter Institute’s “Purely Post & Beam” class. It was hard to believe that the 27 of us would go from zero practical knowledge about timber framing to raising the following 24×24′ timber frame that we had measured, marked, and cut ourselves—in only 5 days!
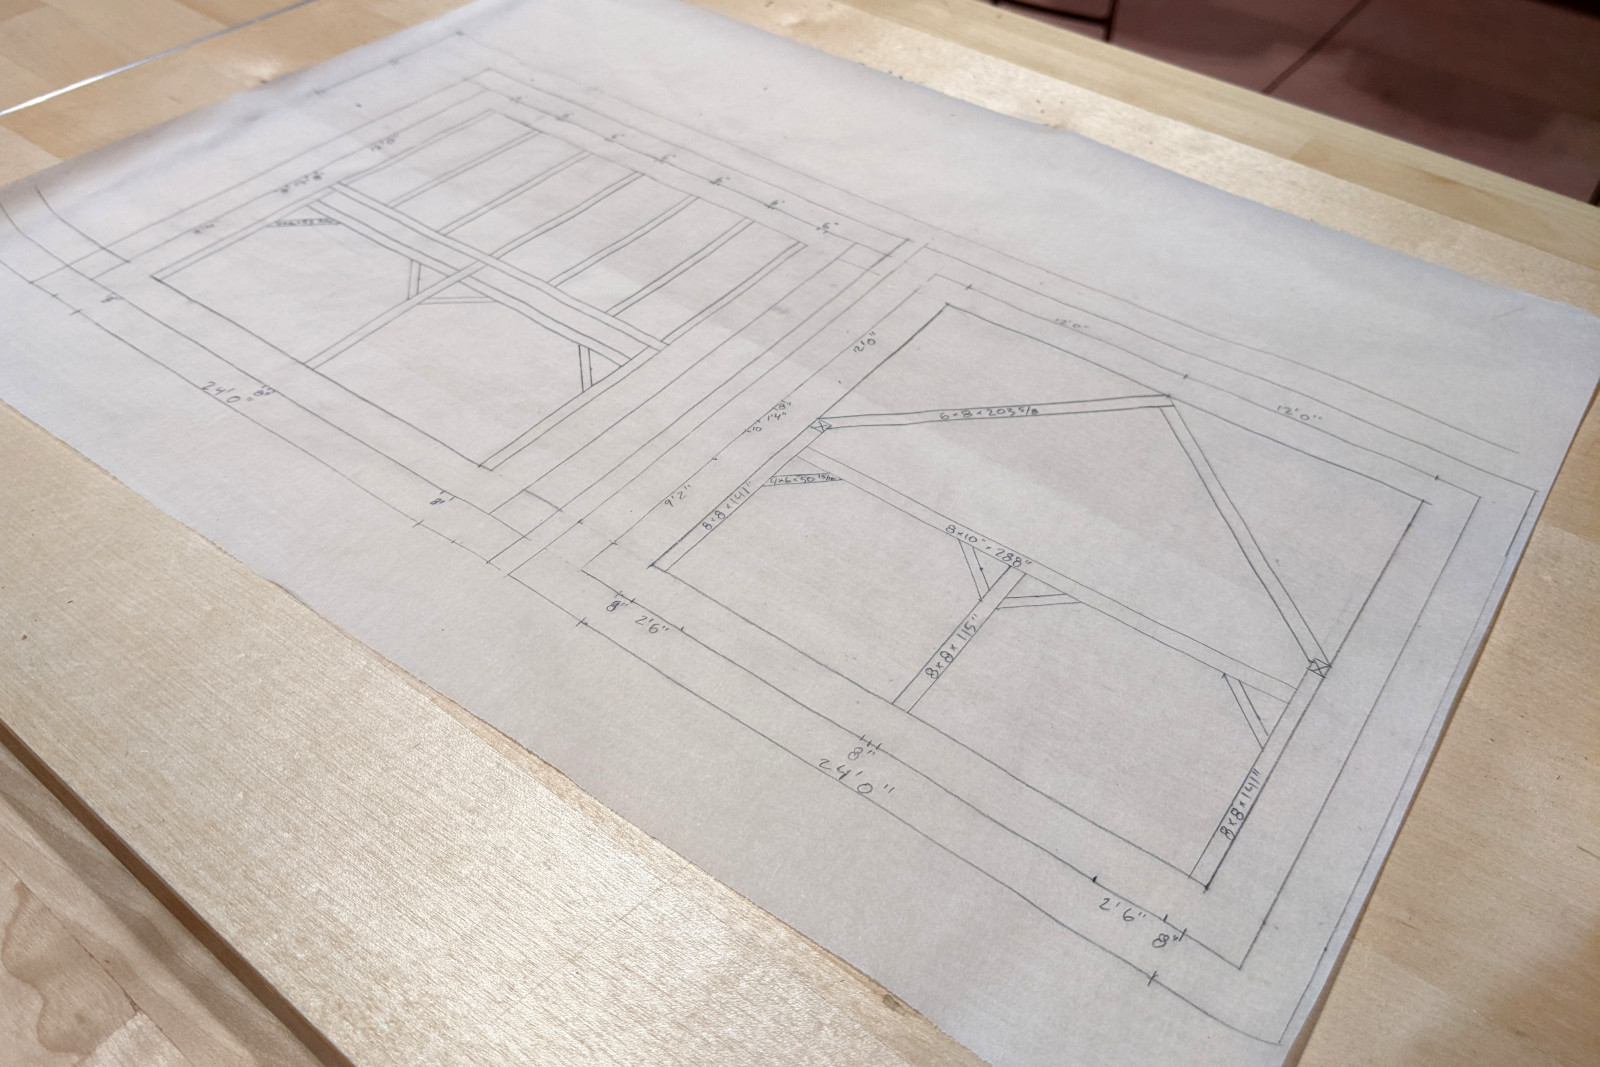
On Monday morning I picked up the timber framing tool kit they’d set aside for me, and found a seat in their timber framed classroom. The day started with brief remarks by Shelter’s 76-year-old founder, Pat Hennin, who then handed the reins over to his son, Gaius, and daughter, Blueberry, as Pat had injured his back a few days earlier. Several of us were more than a little starstruck having already seen so much of them on YouTube. After everyone had introduced themselves, including the staff, Gaius launched into a discussion of the timber framing tools in our kit, most of which were either new to me, or I’d simply never had the need to use before. Then Blueberry taught a fascinating design and drafting lesson where we learned how to layout elevations on vellum using an architect’s scale.
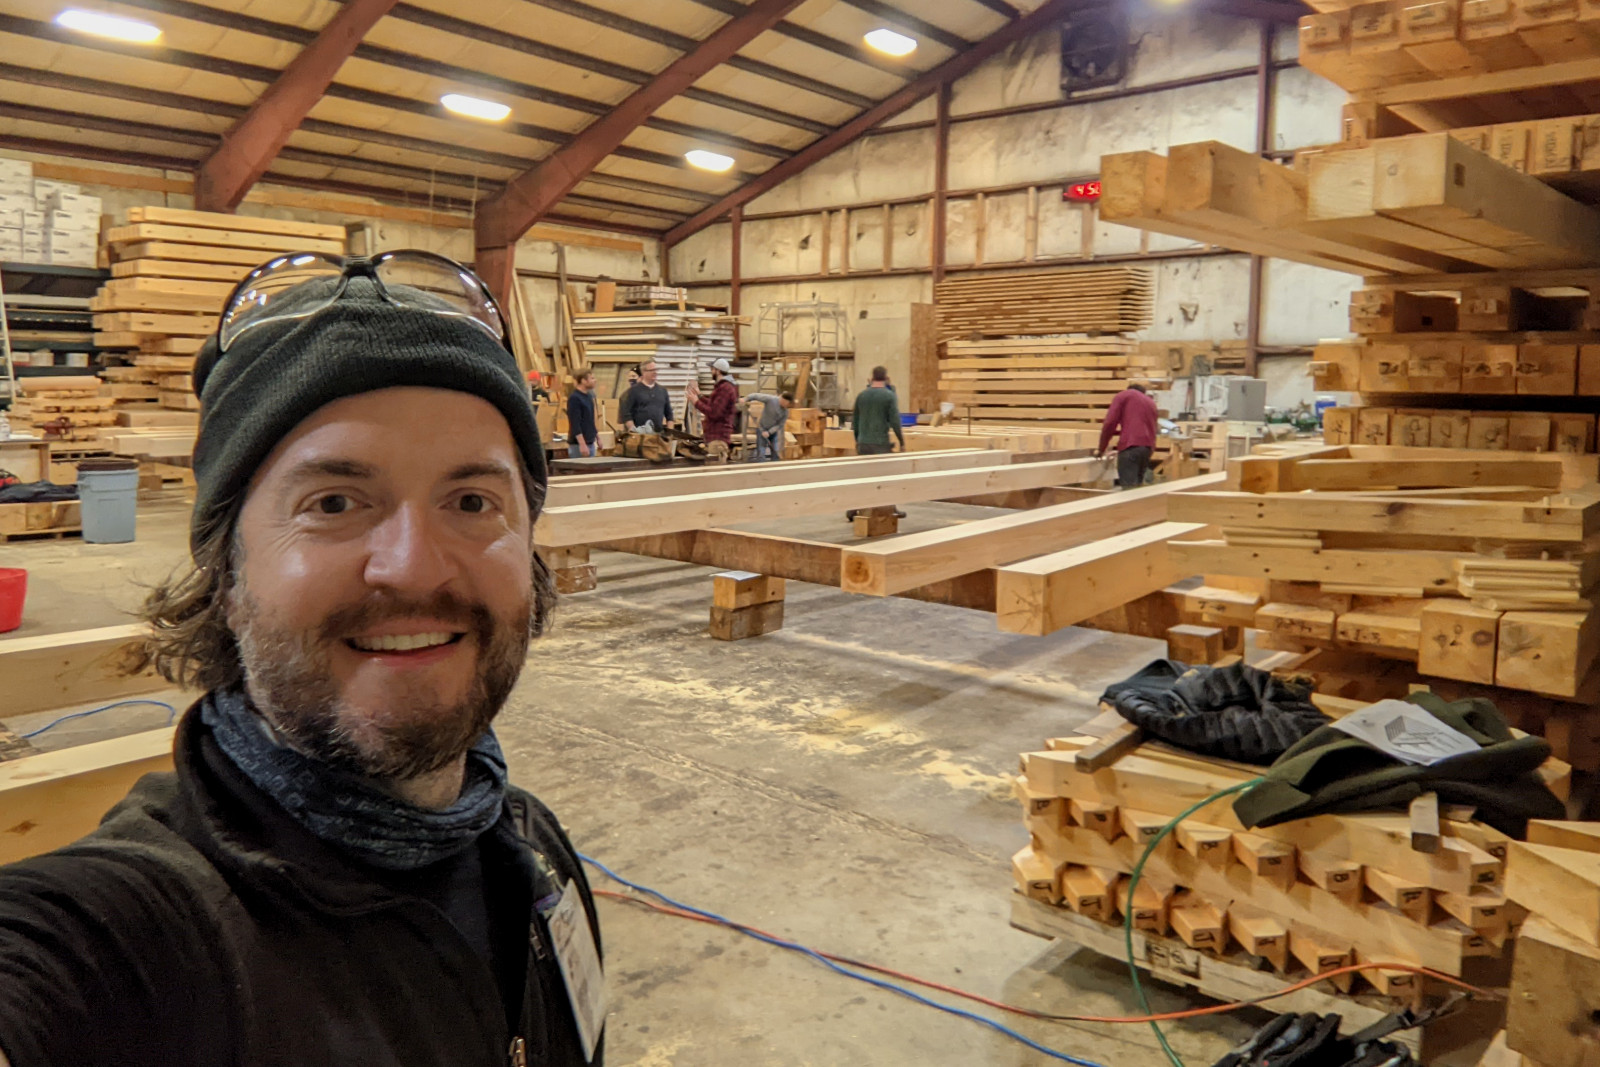
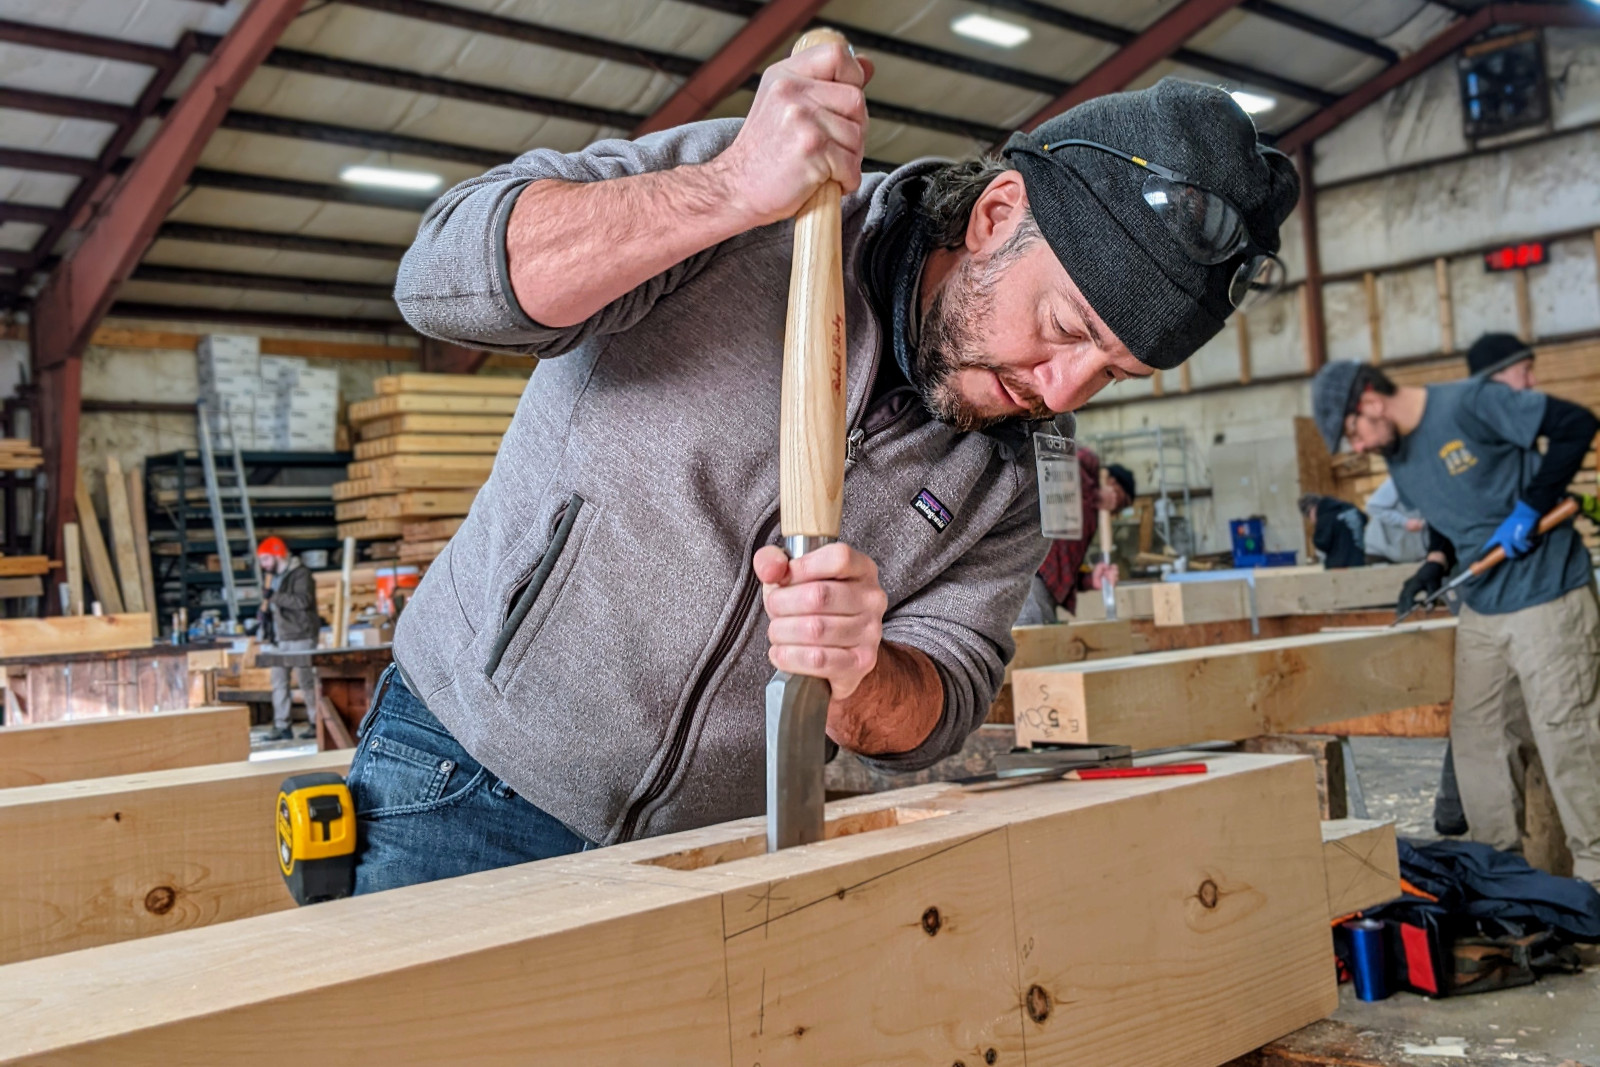
That afternoon we met in the woodshop, an 8,000 square-foot metal frame “hangar” that we’d be taking over for the week. Inside, timbers for customer-commissioned structures were stacked high at the periphery. Gaius passed out cutsheets detailing the mortises and tenons specific to every post, beam, joist, rafter, and wind brace. After he demonstrated how to mark a square cut, score a line, and use the Japanese pull saw from our kits, each of us dispersed to one of the eastern white pine timbers spread throughout the shop. I ended up in front of an 8×10″ beam. (Note: all of the timbers were planed to real dimensions, unlike nominal lumber, where a 2×4 actually measures ~1½×3½″.) First order of business: cutting one end square. Sounds simple, but it’s not something I’d ever done before—unless I got lucky. One tip I’ll never forget: “you’re not cutting on the line if you can’t see the line”. Translation: cut only where the line is visible, and then change positions to follow the line on the opposite face, while the saw blade follows the kerf. All of the beams were longer than necessary, so we did have a margin of error in which to practice making square cuts. But once we moved to the other end, our final cut had to be a perfect cut, i.e., it couldn’t be short or out of square, since it would set the beam’s ultimate length. In my case, it had to be exactly 288 inches (or 24 feet) long. On both ends I first made test cuts all the way through, just to get a feel for the pull saw. Gaius explained how the saw’s geometry caused it to cut more aggressively the farther down one’s hands were on the handle—often to the point of locking up in the green wood. By moving both hands up to the top of the handle, with thumbs actually touching the top edge of the blade, the saw would ease up and cut smoothly. Remarkably, we managed to cut all 44 timbers to length by 5pm, after which we enjoyed a lovely array of homemade soups that Blueberry had made for the class.
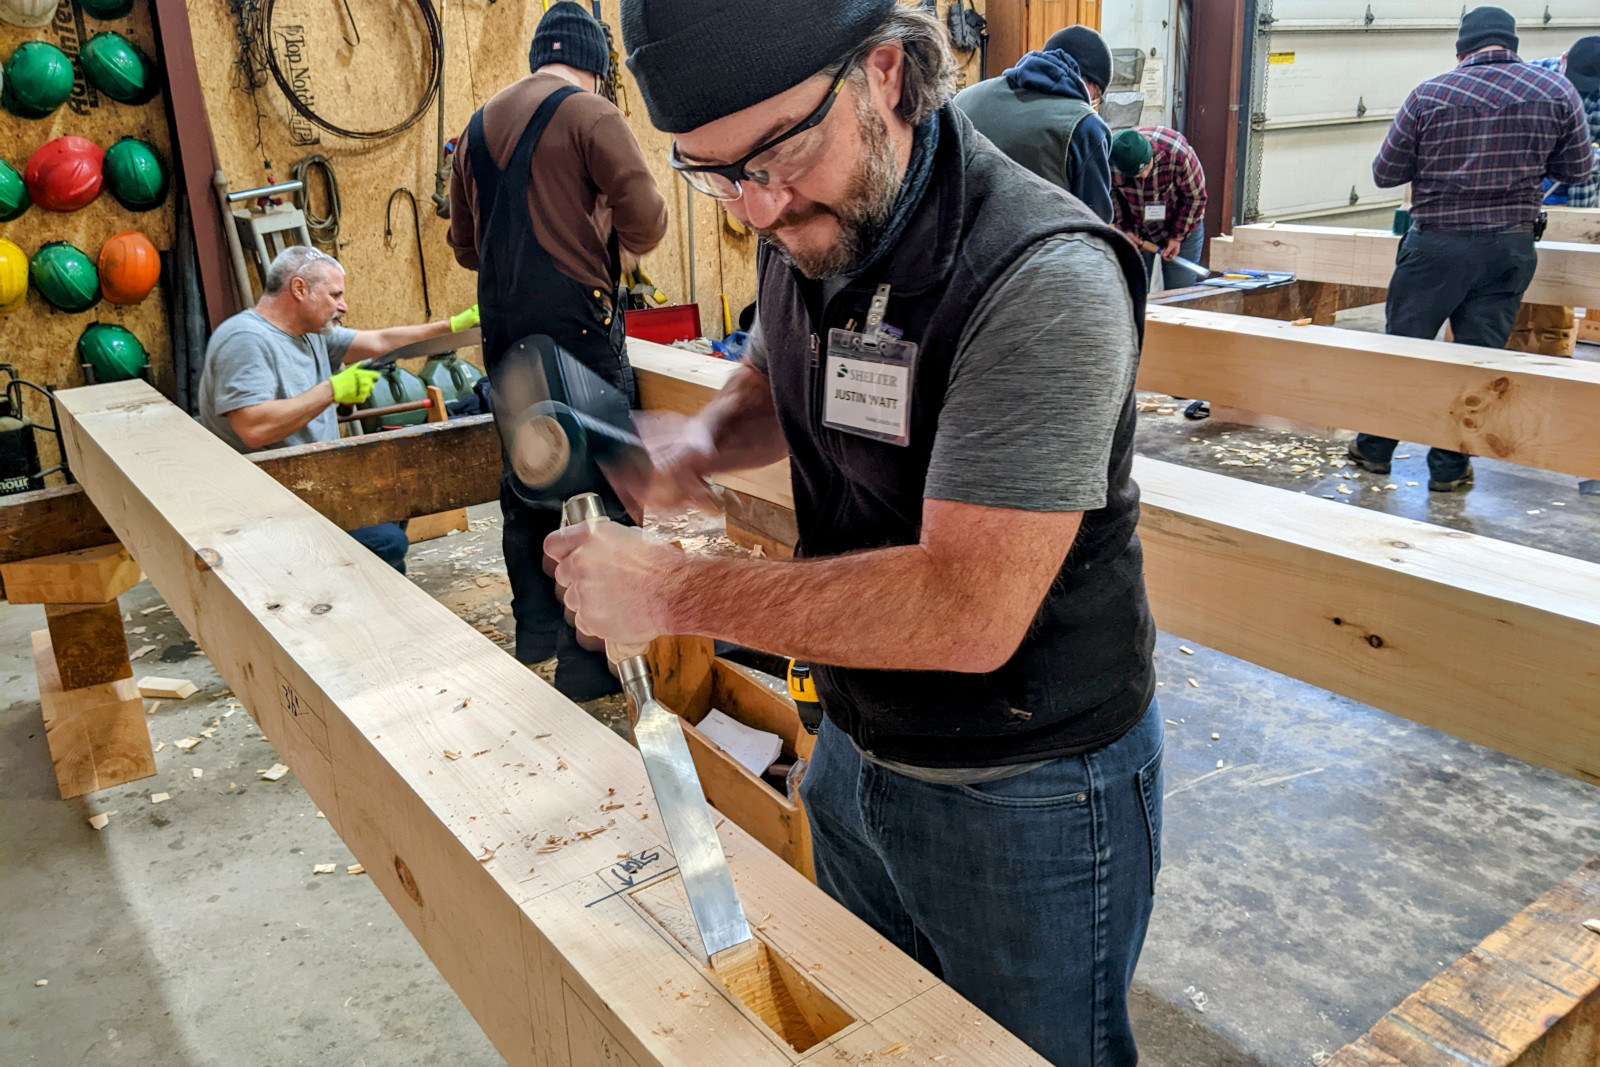
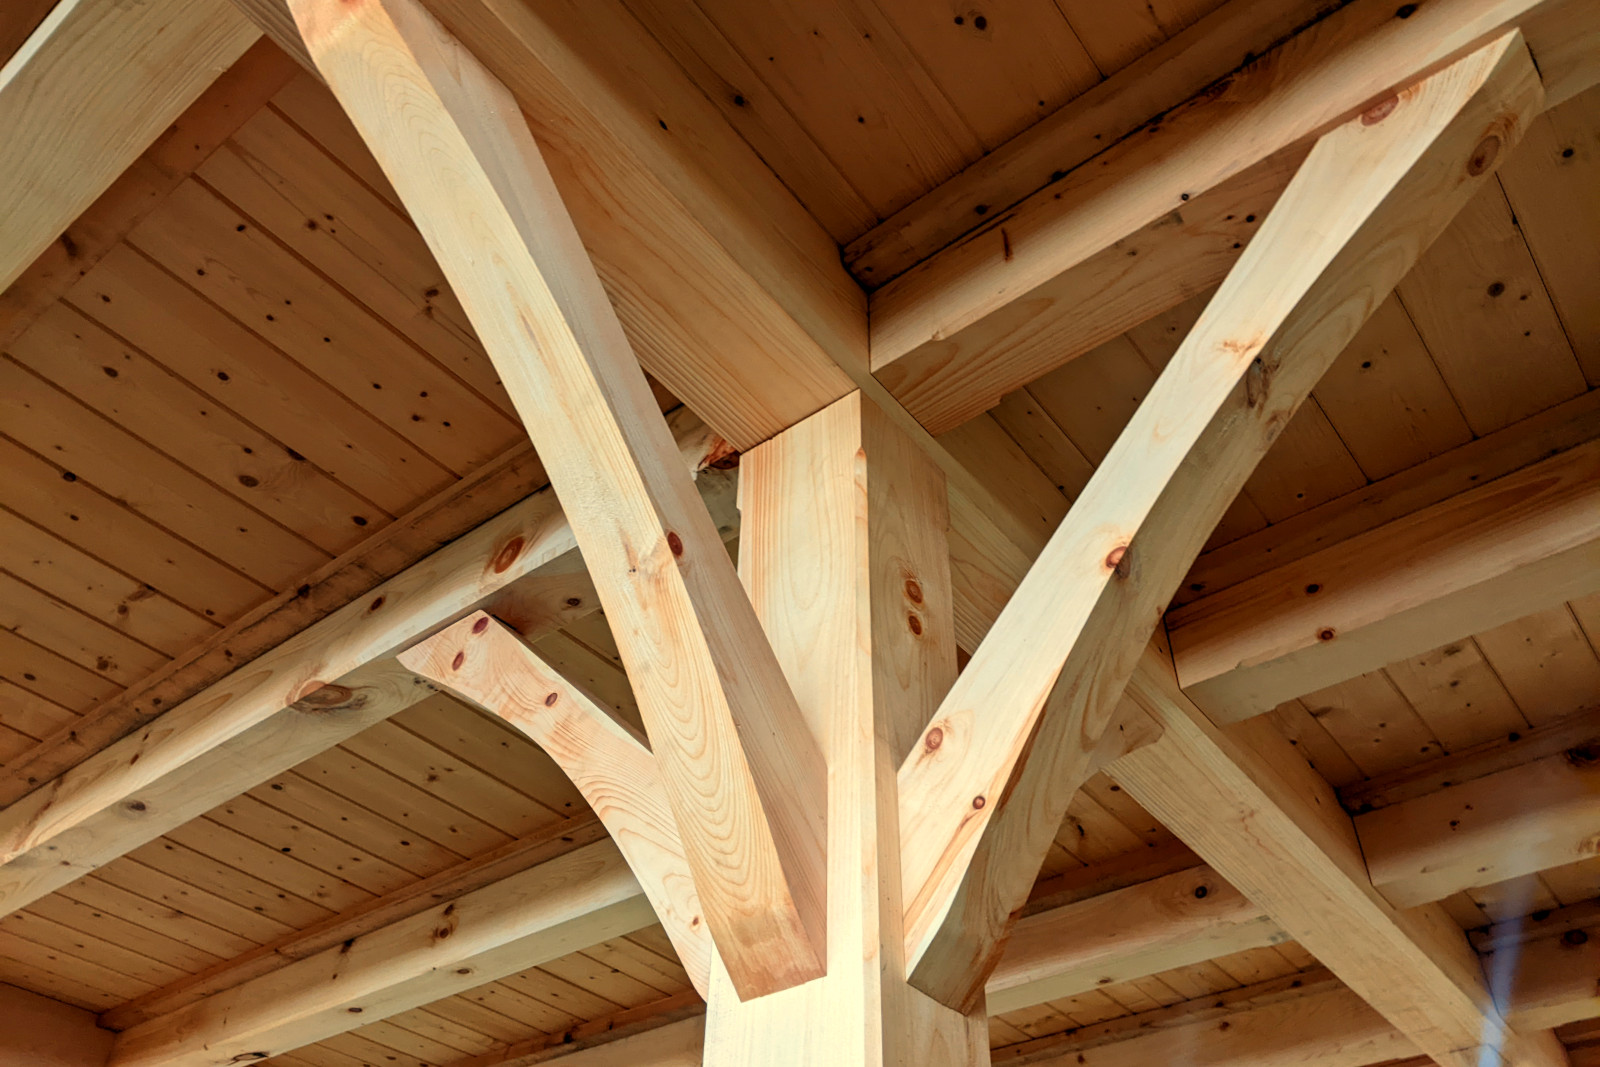
Once they taught us how to sharpen our chisels and slicks first thing Tuesday, we spent all morning sharpening. We began by grinding them with coarse sandpaper on a flat plate of glass together with a honing guide (all provided in our kits). Then we honed them with finer grit sandpaper and polished them with a leather strop doped with aluminum oxide. Once we’d achieved that elusive sharpness, we switched to laying out the joinery on the posts and beams, each according to its own cutsheet. A team of 3 would be responsible for each 8×10″ beam, and a team of 2 for each 8×8″ post. I volunteered for one of the posts that required a complicated thru-mortise with a slanted bottom to accept a wedged half-dovetail tenon from one of the beams. Once our layout had been checked by a staff member, we were given the greenlight to begin scoring the lines and cutting the joints. The general approach was to mark a perimeter with the chisel, one-eighth to one-quarter of an inch inside the score line, then carve out the waste with the chisel (bevel side down), and finally refine the walls with the slick (flat side down) right to the score line, frequently checking for square and adjusting the shavings as necessary. Much of the strength of the joint comes from its tightness, so the precision required here was mind-boggling—certainly nothing I’d ever achieved with wood before, hand tools or not. We’d think we were right on the line (though subconsciously erring by taking off less rather than more), but when one of the staff members would come by to review our work (always supportively and constructively—I never heard a raised voice or harsh word all week), they’d invariably say “I can still feel the score” or “I see a little light coming through the top of the square”. So they’d take off a few translucent shavings with the slick, and then say, “Now it’s on the line” or “See, now it’s square”. The exactitude and zen of their craftsmanship was humbling. I wasn’t sure how late they’d keep us pounding away—until the wee hours of the morning?—but Gaius let us go just after 5, joking that it was best to quit while everyone still had all their fingers.
We resumed work on our joinery Wednesday morning at 8:30. At one point they gave us a demo of some of the power tools they use to speed up roughing out the joints in their commercial production. I could see how with patience and time, one person could easily complete all the joinery in a timber frame with hand tools alone. That said, the class definitely had a contingent who felt that doing all this work by hand would take “forever” and thus came away from the chain mortiser demo almost salivating. Me, I was happy to head back to my chisel, slick, and mallet. We finished our post around 3pm, so I jumped on one of the remaining 4×6″ rafters that needed a half lap joint. I had it just about finished when they told us to start packing up. We all piled back into the classroom for a Q&A session, where everyone was free to ask all their burning timber frame questions, while everyone else benefited from the wide-ranging discussions that followed.
On Thursday morning everyone focused on wrapping up their assigned posts and beams. Those of us who were done worked on cutting the birdsmouth joints on the other end of each rafter. The staff also demoed how they’d used a radial arm saw, table saw, and portable band saw to finish-cut all 24 wind braces in the structure. After lunch we returned to the classroom for a technical and surprisingly in-depth engineering lesson from Gaius. We calculated bending moments, horizontal shear, and deflection for a specific point on a specific joist in the structure. I found it all very eye-opening, and it answered a question that’s been nagging at me for a while now. I’ve watched all these videos on YouTube where someone builds something, like a pergola, and it seemed kind of random whether they’d select, say, a 2×8 or a 2×6. It left me wondering how to choose the appropriate size of lumber to use for a particular purpose in a particular location. In all likelihood these folks on YouTube were winging it—or else relying on rules-of-thumb. But now I knew how someone (usually a Professional Engineer with a CAD program) would go about determining the minimum size of lumber necessary to withstand the static and dynamic forces that can be expected for a specific application in a specific structure. Later that evening, we toured several of the Hennin family’s timber frame barns, and afterwards, gathered at Pat’s timber frame farmhouse for a potluck dinner. Gaius offered to cook lobster for anyone who brought one. When in Rome, right?

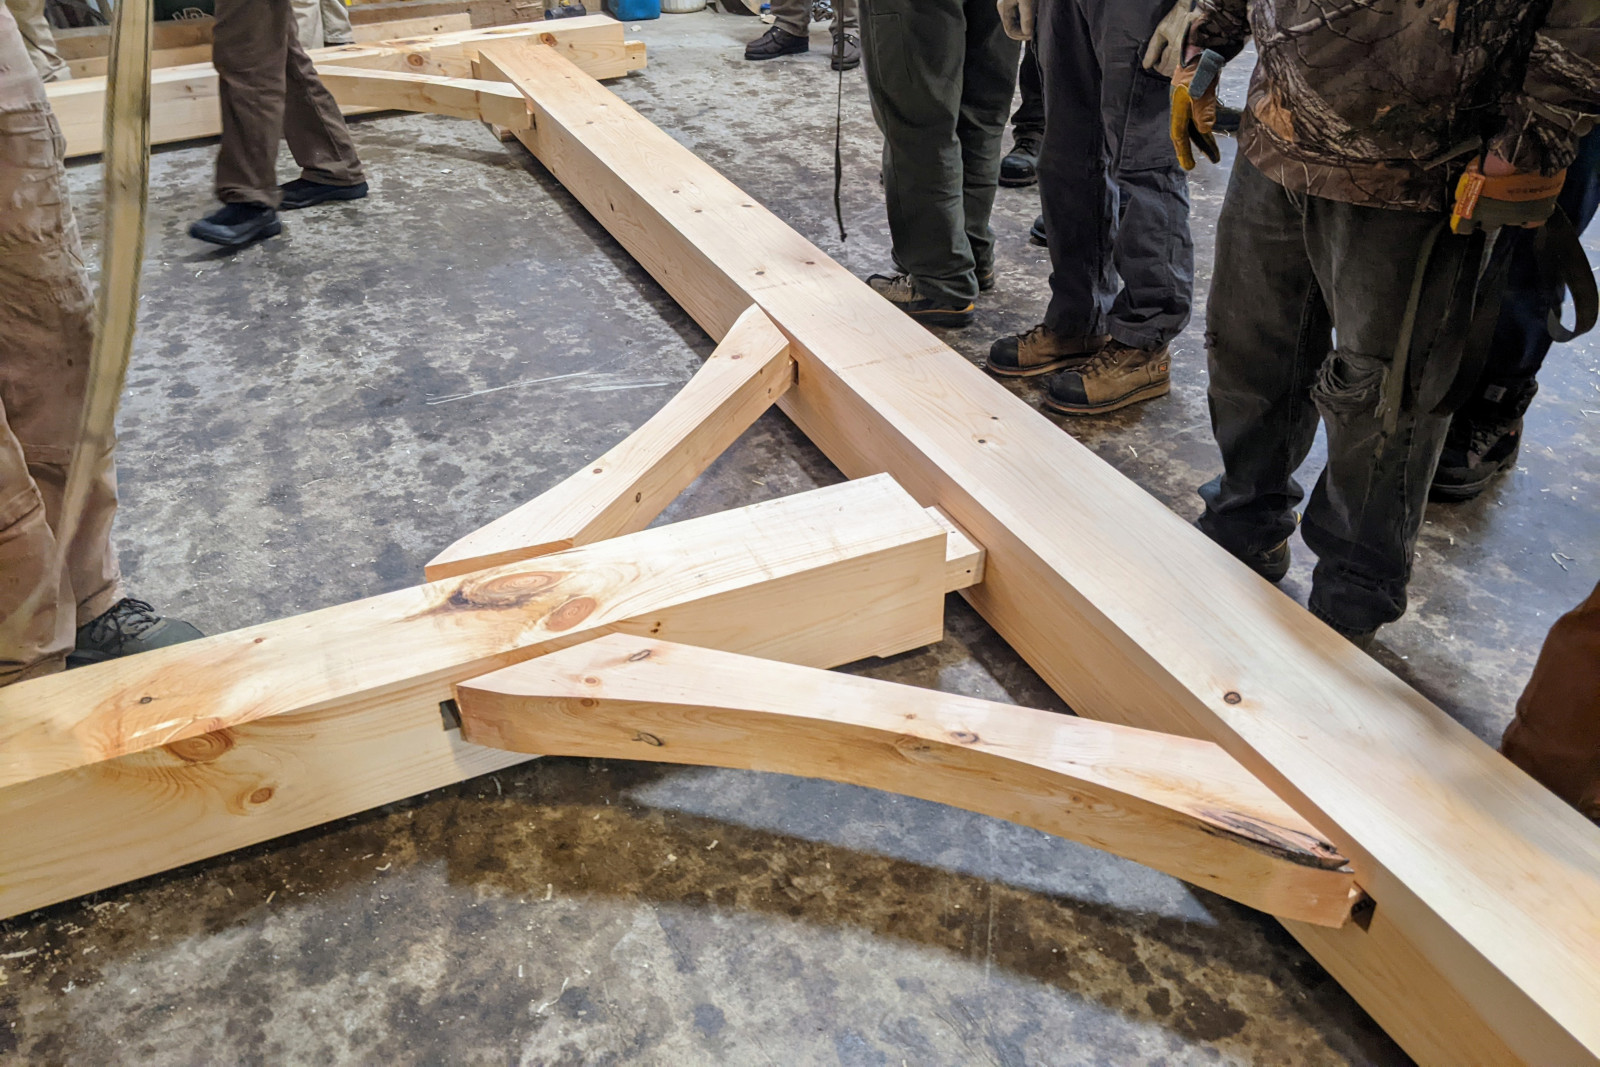
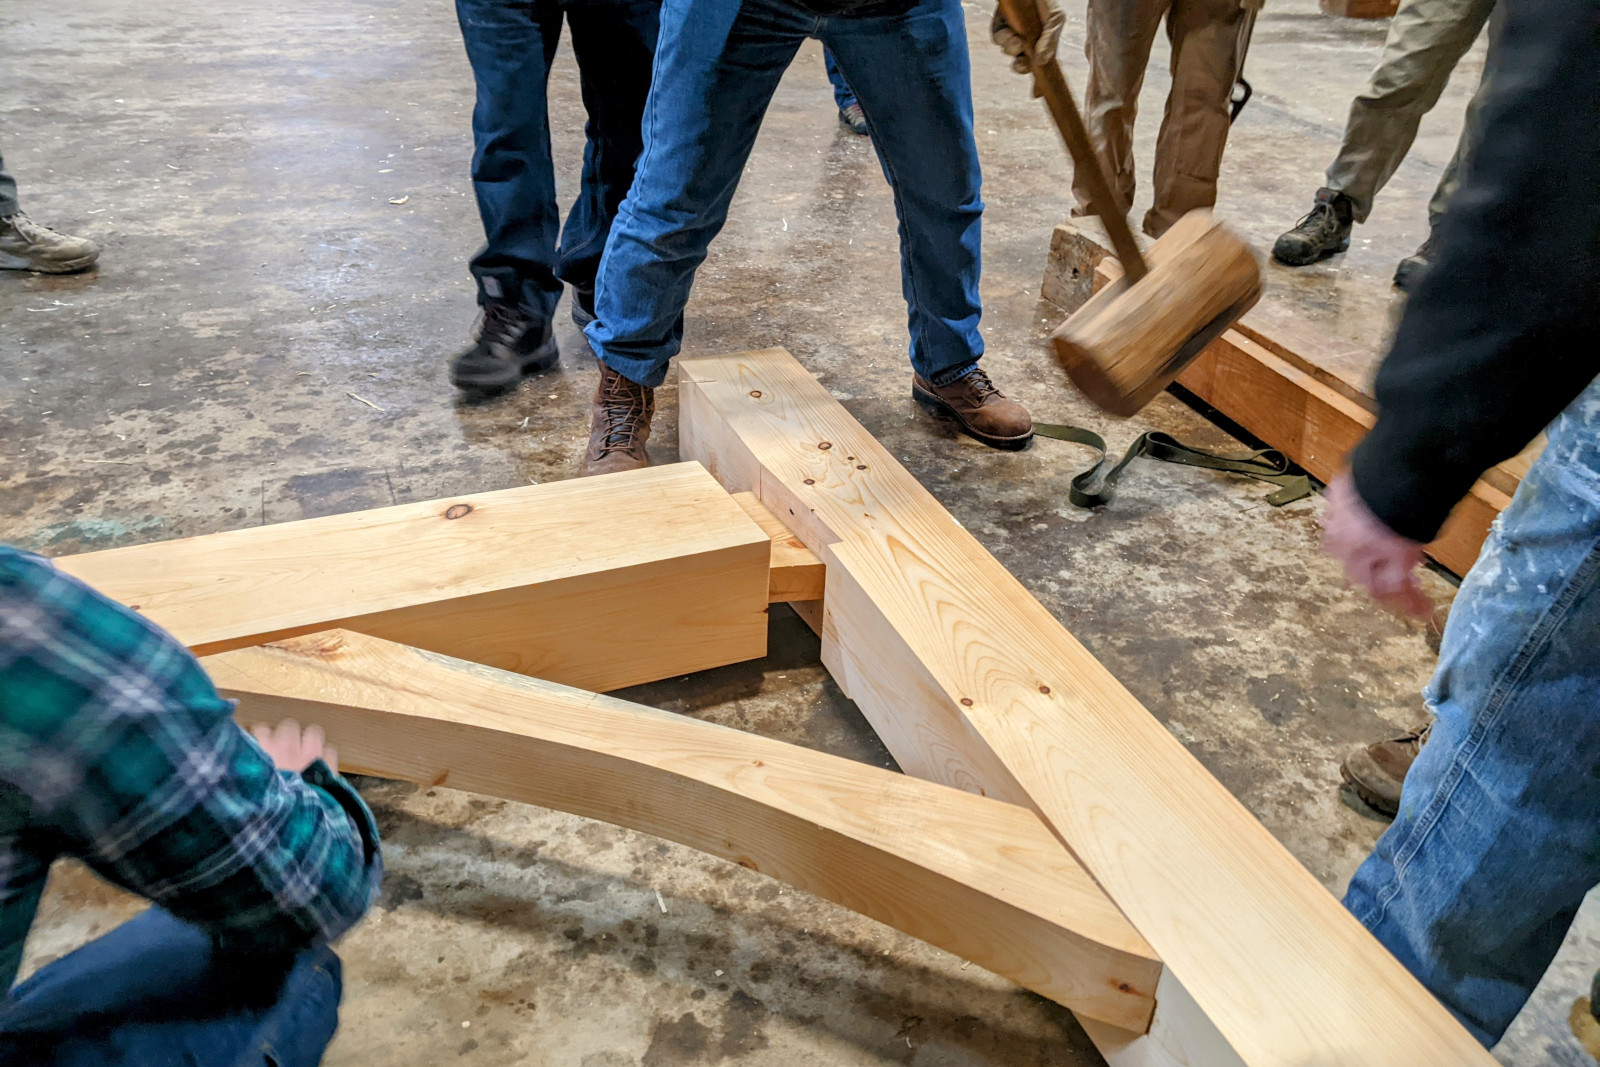
We arrived at the shop on Friday morning eager to raise our timber frame. The process started by laying on the ground the beam, posts, and wind braces that made up a single bent (or cross-section) of the structure. This was easier said than done as each beam weighed over 600 pounds. So it took about 20 of us to carry it into position. We used a heavy duty ratchet strap to pull the center post into the beam while both side posts where pulled into position with straps connected to a “come-along”. A cartoonishly large wooden mallet called “the commander” helped to “finesse” the joinery together. Once all the joints were tight (using a mirror to check the undersides) about 15 of us took positions along the beam to lift the assembled bent off the ground, while another 6 to 8 folks stood behind us with poles at the ready, to continue raising the bent once the beam was higher than we could reach. After the first bent was secured with temporary bracing, we repeated the process for the second bent. Two staff members, perched on each beam, installed a joist to connect the bents, thus stabilizing the structure. The other joists were slid into their dovetail mortises before we assembled and raised the third and final bent, again locking it into place with joists. At this point, for efficiency and safety’s sake, they used a forklift to hoist a stack of tongue-and-groove planks (pre-assembled into sections) to create a temporary floor, followed by the 2 top plate beams that supported the rafters. As the structure would later be disassembled, we only raised 1 of the 7 pairs of roof rafters, which was secured with mechanical fasteners through each birdsmouth into the top plate. And that was it. After only two and a half hours, the timber frame was up. And after a short graduation ceremony, we were officially dubbed “timber framers”!
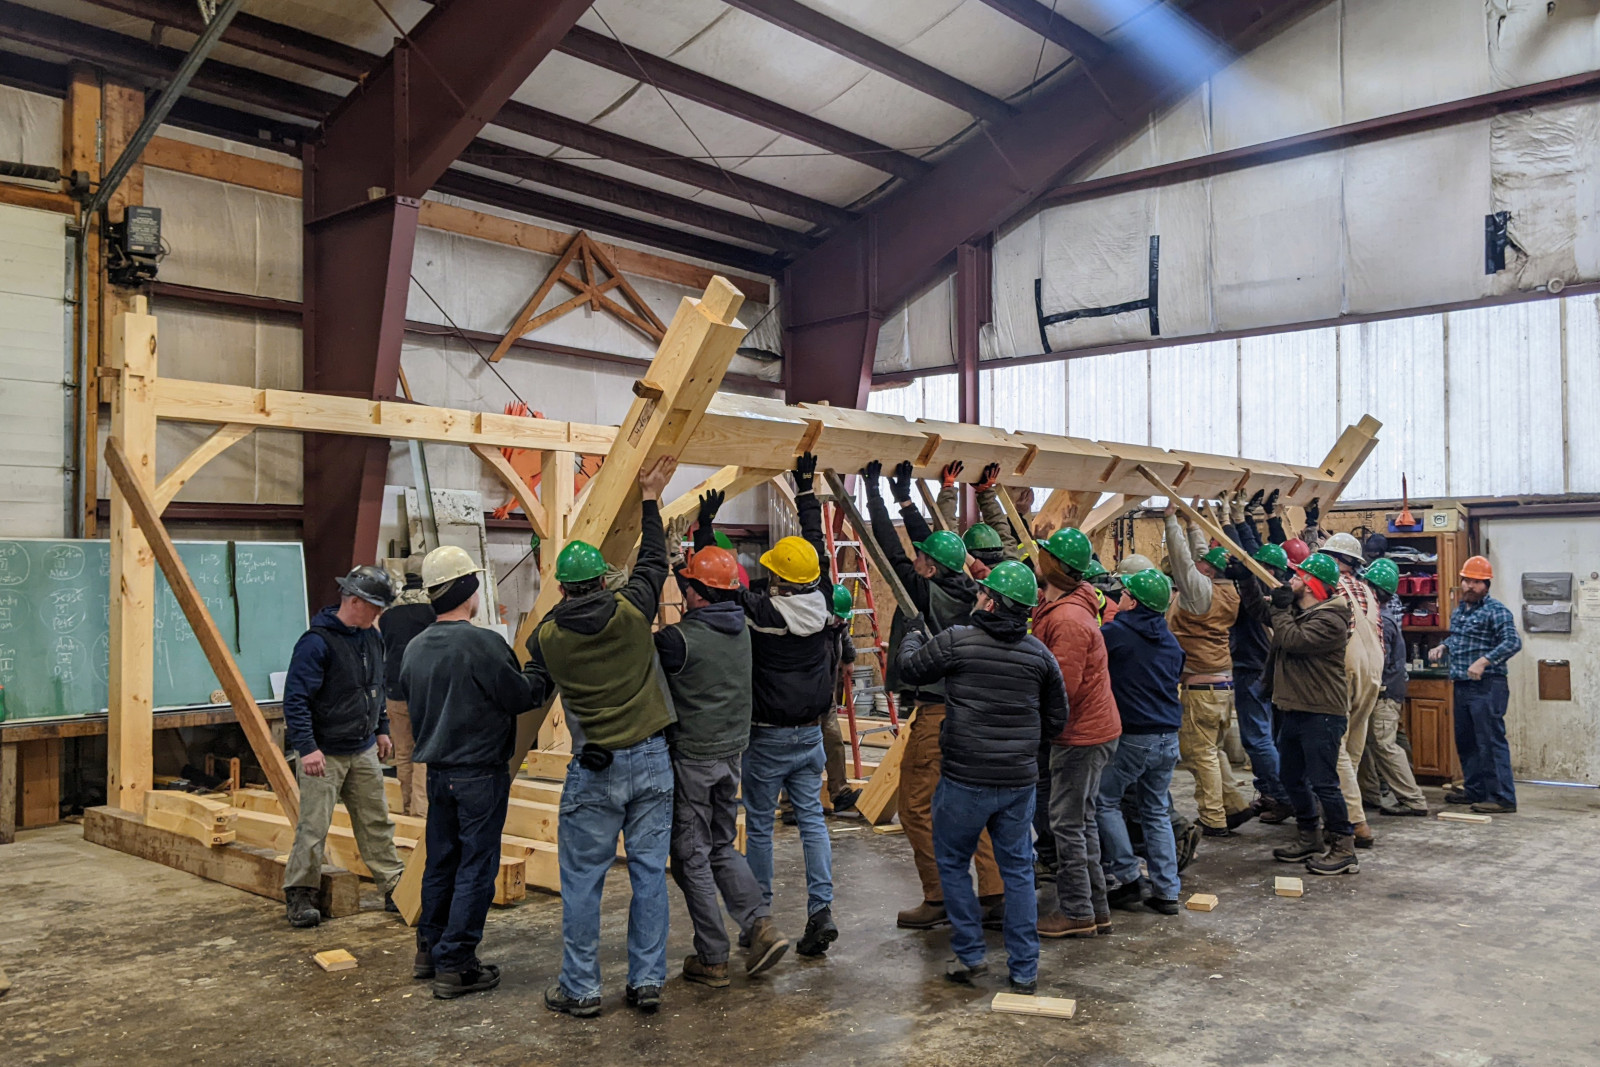
![Raising the roof [rafters] on day 5 of Shelter Institute's Purely Post & Beam class](/images/shelter-institute-purely-post-and-beam-day-5-raising-the-roof.jpg)
Wonderful to see the structure come alive.
Shelter Institute has been on my imaginary bucket list for a long time (right there along with North House Folk School). Very cool to see a friend actually attending. Love hearing about your life, Justin—it inspires me to try to realize more of these interests myself.
Hi Justin, can’t believe i missed this post . Maybe you remember, I’m a draughtswoman (architecutre). I recommend you to take a look at the free program “Sketschup” before you continue drawing with parchment paper. ;-) https://www.sketchup.com/ Greetings from Germany – Geli
I added the excerpt from Wallace Stegner’s enthralling novel Angle of Repose, which I read a few weeks after the class. I need to find a copy of Mary Hallock Foote’s A Victorian Gentlewoman in the Far West to see if the quote originates there—as Stegner liberally (and somewhat controversially) used passages from her letters and memoirs in his novel.