How to use the command line
This “howto” is intended for people who may be new to Ubuntu (or Linux in general), or who spend most of their time using the graphical user interface (aka GNOME), but are occasionally confronted by other howtos that assume knowledge of “the terminal”. My hope is to provide a helpful reference (or cheatsheet) for the most common commands you’ll need to navigate using the command line interface.
How to open the terminal
In the top left, go to Applications > Accessories > Terminal:

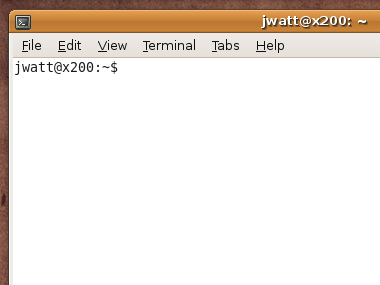
A window should open that looks like this:

What is a command prompt?
The text displayed in the terminal window before the dollar-sign is called the “command prompt”. In my case it is jwatt@x200:~$ where jwatt is my username, x200 is the name of my computer, and ~ (tilde) is short for my home directory (which happens to be /home/jwatt).
All the commands you type will appear after the dollar sign, and some commands, like those that change directories, actually change the appearance of the command prompt (to help you remember where you are). In the examples below, I’ve copied all the commands I’ve typed, along with their results and the command prompt, for added realism.
After you type a command, hit the Enter key to execute it. If the command outputs any results, they will be printed out, followed by a new command prompt.
Figure out where you are
pwd – present working directory
jwatt@x200:~$ pwd
/home/jwatt
jwatt@x200:~$
List out the files and directories where you are
ls – list
jwatt@x200:~$ ls
Desktop  test
jwatt@x200:~$
Change directories
cd – change directory
Use cd x to bring you into the “x” directory:
jwatt@x200:~$ cd test
jwatt@x200:~/test$ pwd
/home/jwatt/test
jwatt@x200:~/test$
Use cd .. to bring up a directory:
jwatt@x200:~/test$ cd ..
jwatt@x200:~$ pwd
/home/jwatt
jwatt@x200:~$
Use cd alone to bring you back to your home directory:
jwatt@x200:~$ cd test
jwatt@x200:~/test$ cd
jwatt@x200:~$ pwd
/home/jwatt
jwatt@x200:~$
Create a file
touch – touch a file to make it exist
jwatt@x200:~$ cd test
jwatt@x200:~/test$ touch notes.txt
jwatt@x200:~/test$ ls
notes.txt
jwatt@x200:~/test$
Create a directory
mkdir – make directory
jwatt@x200:~/test$ mkdir notes
jwatt@x200:~/test$ ls
notes  notes.txt
jwatt@x200:~/test$
Move or rename a file
mv – move
To move a file, provide the file plus the destination directory:
jwatt@x200:~/test$ mv notes.txt notes
jwatt@x200:~/test$ ls
notes
jwatt@x200:~/test$ cd notes
jwatt@x200:~/test/notes$ ls
notes.txt
jwatt@x200:~/test/notes$
To rename a file, provide the file plus a new filename:
jwatt@x200:~/test/notes$ mv notes.txt notes2.txt
jwatt@x200:~/test/notes$ ls
notes2.txt
jwatt@x200:~/test/notes$
Copy a file
cp – copy
jwatt@x200:~/test/notes$ cp notes2.txt notes3.txt
jwatt@x200:~/test/notes$ ls
notes2.txt  notes3.txt
jwatt@x200:~/test/notes$
Remove a file
rm – remove
Be careful, there is no undo!
jwatt@x200:~/test/notes$ rm notes3.txt
jwatt@x200:~/test/notes$ ls
notes2.txt
jwatt@x200:~/test/notes$
Remove a directory
rmdir – remove directory
Note: the directory must be free of all files before it can be deleted.
jwatt@x200:~/test/notes$ ls
notes2.txt
jwatt@x200:~/test/notes$ rm notes2.txt
jwatt@x200:~/test/notes$ cd ..
jwatt@x200:~/test$ rmdir notes/
jwatt@x200:~/test$ ls
jwatt@x200:~/test$
Run a command with elevated privileges
sudo – superuser do
Typically this is required when installing software (see below). sudo will prompt you for your password before executing the command that follows, making sure the change is being made by a user with the appropriate privileges, as well as giving you a moment to make sure you really want to run the command.
Install something on Ubuntu
apt-get install – apt package installer
Most other online howtos usually take the form of a long line of apt-get install commands, as this is the quickest way to instruct someone to install several software packages at once. If the site instructing you to install software is a trusted source, you can simply copy the apt-get install command, paste it into the terminal, and hit enter to run.
Because installing software on your computer requires elevated privileges, you’ll need to preface the apt-get install command with sudo.
jwatt@x200:~$ sudo apt-get install sl
[sudo] password for jwatt:
Reading package lists... Done
Building dependency tree
Reading state information... Done
The following NEW packages will be installed:
  sl
0 upgraded, 1 newly installed, 0 to remove and 0 not upgraded.
Need to get 0B/25.3kB of archives.
After this operation, 197kB of additional disk space will be used.
Selecting previously deselected package sl.
(Reading database ... 145527 files and directories currently installed.)
Unpacking sl (from .../archives/sl_3.03-15_i386.deb) ...
Processing triggers for man-db ...
Setting up sl (3.03-15) ...

jwatt@x200:~$
Nice! I’ll try to give it a shot by myself and see if the instructions work ;)
On most linux systems (though it’s nice that Ubuntu defaults to your home dir with a simple ‘cd’), a cd with a tilde character
cd ~
will get you home.
Also man pages are good too.
Hmm, I didn’t realize that just
cdalone wasn’t standard. Yep,cd ~works too :)At first, I thought this was satire.
miconian, which part struck you as satirical?
Oh, maybe starting this “this is how you open up the terminal”…
LOL, satire or not, it’s useful. While it’s easier under Ubuntu, it took me a while to find the ‘terminal’ under mac OS…a game of hide’n’seek even…
Actually, it was the title. I just thought it was funny, and I know you’re a developer, so I was prepared for snarkiness when I started reading. It’s all props to you that you are actually a really nice guy who just wants to help people. Maybe I’ve been jaded by the year I spent asking people for help on #debian.