Web Photo Editor extension for GIMP
Updated for GIMP 2.4!
 …or how to “Justinify” your photos
…or how I learned Lisp on a Saturday night
Yesterday I was working on a project where I needed to resize and “retouch” over a hundred photos for the web.
I tried playing with ImageMagick’s command line mogrify tool, but I wasn’t too pleased with the results—that and there’s something inherently tedious about making visual transformations from the command line. I performed the same operations in GIMP to compare, and it looked much better.
So I was confronting the idea that I’d have to manually edit all 100+ photos when I finally decided to buckle down and learn how to script GIMP.
GIMP uses Scheme (of all things) as its scripting language; Scheme being one of the two popular modern dialects of Lisp; Lisp being the holy grail of high-level programming languages (and the second oldest, after Fortran). So little did I realize, scripting GIMP was going to force me to learn Lisp…
I have to admit I’ve thought for a long time it’d be great to have a tool that brought together all of the settings I usually tweak when I’m editing a photo (color balance for brightness, contrast, saturation, and sharpening) because in GIMP they’re located deep in three different submenus. But doing one photo at a time was never motivation enough to dig under the hood. The thought of retouching 100+ photos, however, was the anvil that broke the camel’s back.
I learn best by looking at very simple but functional examples, so I started scouring the web to see what other people were doing, eventually landing on Dov Grobgeld’s Basic Scheme tutorial at gimp.org. It goes from how to add numbers in Scheme to creating your first extension in less time than it’s probably taken you to read this far. David M. MacMillan’s Some GIMP Scripts-Fu was also a great resource.
I have to say the best thing about GIMP’s extensions is that they enable the creation of rudimentary user interfaces for inputting configurable parameters. So I wasn’t limited to just my standard defaults for contrast and saturation—I could actually “build” an interface with tweakable values. Hot!
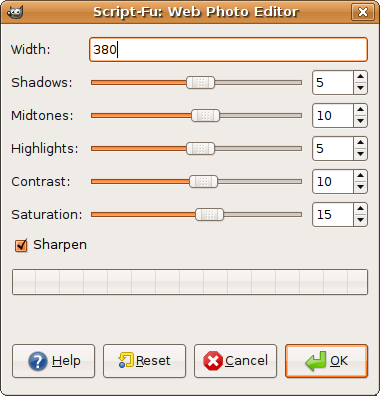
Around 3am last night, I finally put all the pieces together. Here’s what the Web Photo Editor looks like:

Installation Instructions
- Right click on web-photo-editor.scm and save it in:
~/.gimp-2.4/scripts/on LinuxC:\Documents and Settings\name\.gimp-2.4\scriptson Windows (replacing name with your Windows user name)
- Open or restart GIMP
- Under File > Preferences > Tool Options, make sure “Default Interpolation” is set to “Cubic (best)”. This will ensure that the extension resizes your photos at the highest quality.
- Under File > Preferences > Interface, click “Configure Keyboard Shortcuts…” and expand the “Plugins” entry. Scroll all the way to the bottom until you find “Web Photo Editor”. Select it and choose a keyboard shortcut. I set mine to Alt+W.
How to Use
- Open a photo with GIMP
- Make any changes to the photo that require manual intervention (rotation, cropping, etc)
- Press your keyboard shortcut for the Web Photo Editor (e.g. Alt+W) or right click on the image and goto Filters > Web > Web Photo Editor…
- A window should pop up like the one above. All the settings are reasonably good defaults (which you can change at the bottom of web-photo-editor.scm if you like).
- I’ve set the default width to 450 pixels. Note: the resizing option will only resize down, it won’t resize up.
- Shadows, Midtones, and Highlights adjust the brightness of their respective light ranges, without washing out the photo. The defaults are good for underexposed shots and computer monitors in general.
- Contrast makes the darks darker and the lights lighter
- Saturation makes the colors richer
- Sharpening emphasizes details and edges, especially after resizing
- Click Ok and you’re good to go—though you might need to adjust the zoom to 100% after resizing
- To “experience” the effect of your changes, just press Ctrl+Z to undo the changes up to right before the resizing step. Then press Ctrl+Y to see the changes applied. I often flip back and forth to decide if I like the effect. If you want to adjust the settings, just press Ctrl+Z again, and then rerun the extension with different values.
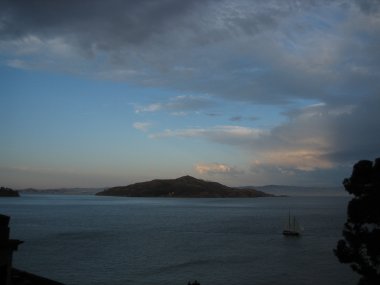
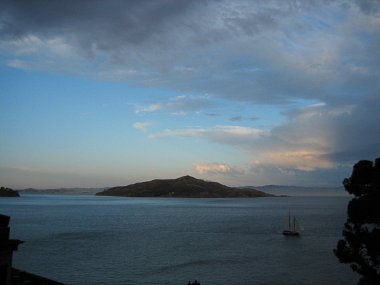
Example


The Code
In all its parenthetical glory:
(define (web-photo-editor image
                          drawable
                          newwidth
                          shadows
                          midtones
                          highlights
                          contrast
                          saturation
                          sharpen)
  (let* ((drawable  (car (gimp-image-active-drawable image)))
         (oldwidth  (car (gimp-image-width image)))
         (oldheight (car (gimp-image-height image)))
         (newheight (* newwidth (/ oldheight oldwidth)))
        )


    (if (> oldwidth newwidth)
      (gimp-image-scale image newwidth newheight)
    )

    (gimp-image-undo-group-start image)

    (gimp-selection-none image)

    (gimp-color-balance drawable 0 0 shadows shadows shadows)
    (gimp-color-balance drawable 1 0 midtones midtones midtones)
    (gimp-color-balance drawable 2 0 highlights highlights highlights)

    (gimp-brightness-contrast drawable 0 contrast)

    (gimp-hue-saturation drawable 0 0 0 saturation)

    (if (= sharpen TRUE)
      (plug-in-unsharp-mask 1 image drawable 0.4 0.2 0)
    )

    (gimp-image-undo-group-end image)
  )
)

(script-fu-register "web-photo-editor"
                    "_Web Photo Editor..."
                    "Brings together some common operations to edit a photo for the web, including resizing, contrast, color balancing, saturation, and sharpening. For more information, see:\nhttp://justinsomnia.org/2007/09/web-photo-editor-extension-for-the-gimp/"
                    "Justin Watt http://justinsomnia.org/"
                    "Copyright 2007 by Justin Watt; GNU GPL"
                    "2007-11-07"
                    "RGB*"
                    SF-IMAGE       "Image"           0
                    SF-DRAWABLE    "Drawable"        0
                    SF-VALUE       "Width"           "450"                   ; defaults to 450
                    SF-ADJUSTMENT  "Shadows"         '(5  -100 100 5 10 0 0) ; defaults to 5
                    SF-ADJUSTMENT  "Midtones"        '(10 -100 100 5 10 0 0) ; defaults to 10
                    SF-ADJUSTMENT  "Highlights"      '(5  -100 100 5 10 0 0) ; defaults to 5
                    SF-ADJUSTMENT  "Contrast"        '(10 -127 127 5 10 0 0) ; defaults to 10
                    SF-ADJUSTMENT  "Saturation"      '(15 -100 100 5 10 0 0) ; defaults to 15
                    SF-TOGGLE      "Sharpen"         TRUE
                    )
(script-fu-menu-register "web-photo-editor" "<Image>/Filters/Web")
[…] the order they were taken, maybe with one quick preview of the set ahead of time. At this point my Gimp Web Photo Editor extension is a crazy time-saver. In most cases, I just tweak the settings for the first photo and use those […]
Just revved this extension and post for the recent release of GIMP 2.4.
That’s a nice one, though I’d find it even more useful if I could invoke it from the command line, and write a bash script which would automatically process all the photos in a given directory.
(You *are* aware of the GIMP’s Batch feature, right?)